

Info pages
What you need to know about pressure fermentation.
Pressure fermentation, or perhaps better described as fermentation under pressure, is a concept that has gained more and more popularity among craft brewers over the past few years. Many of the breweries have been using this technique for many years and now due to innovation and advances in brewing equipment, craft brewers are able to use it and achieve impressive results.
Trying new strategies to improve the beer you make is one of the many enjoyable aspects of hand brewing.

In this post I will explain exactly what pressure fermentation is, I will explain its pros and cons, which beers you can use this technique with, the steps involved in pressure fermentation and finally how to dry hop under pressure.
Table of contents:
- Advantages of pressure fermentation
- Disadvantages of pressure fermentation
- What types of beer can be fermented under pressure?
- 2 steps for pressurised beer fermentation
- How to ferment under pressure
- Dry hopping during pressure fermentation
- Curiosity
What is pressure fermentation?
Okay, let's start with the basics. During fermentation, the yeast goes to work converting the sugars in the wort into alcohol and CO2. The typical hand brewer has a plastic or steel fermentation vessel with a yeast lock at the top. We fill the yeast lock with disinfectant or water to keep the oxygen and bacteria out. As CO2 from the fermentation is produced, it escapes from the yeast lock.
When you ferment under pressure, you don't let all the CO2 escape, which I will explain later. By trapping the gas inside the fermenter, the internal pressure starts to rise, which causes the beer to ferment under pressure. This pressure is greater than atmospheric pressure or 0 Bar, which causes some things to happen to the beer, one of which is that it absorbs CO2 and becomes carbonated.
Advantages of pressure fermentation
1 - No exposure to oxygen:
The only time you want oxygen near your beer is when you first add your yeast. We have to be constantly on guard to make sure we don't let oxygen into our beer. If the beer becomes oxidised, you'll get nasty off-flavours, or even worse bacteria that can get in and ruin your entire brew.
There are several instances during the brewing process fermentation, dry hopping, transfer and bottling that we can expose our beer to oxygen and thus achieve harmful effects.
Some examples are:
- Transfer from a primary to a secondary yeast tank.
- Transfer to your bottling bucket.
- Transfer to kegs, cans or bottles.
- Addition of hops during dry hopping.
- When we seal our kegs, if we don't purge the oxygen well enough.
- If we let our yeast lock run out of disinfectant.
Pressure fermentation prevents all these things and ensures you brew the highest quality beer. That's what separates the beginner from the professional!
2 - Fermentation progresses much faster:
When we ferment our beer, we typically strive to keep the temperature within the range indicated on the yeast package because higher temperatures can create unfortunate off-flavours in our beer.
Higher temperatures bring the yeast to life, they get really fired up and their metabolism goes into overdrive. Yes, you'll end up with a fast fermentation and a very fermented beer and the result won't be what you're looking for. The higher temperatures result in ethyl acetate esters, which are part of the same family as thinners, lacquers and even nail polish. Not the type of flavour you want in your beer.
Pressurised fermentation at higher temperatures limits these off-flavours from occurring while significantly speeding up fermentation time. This is one of the reasons why breweries use this method. The faster they can produce more beer while maintaining quality, the better it is for business.
3 - Significant reduction of bee stings:
Many of the typical by-products of traditional fermentation are significantly reduced during pressure fermentation, because ester production is significantly reduced.
Esters are responsible for fruit-like off-flavours, which while desirable in a select few beer styles, are not desired in most. Another off-flavour that pressurised fermentation will reduce is diacetyl, which has an undesirable buttery popcorn-like taste. Using this technique results in a much cleaner fermentation.
4 - Yeast, carbonis and server from fermentation tank:
Yes, you can literally do it all from the fermentation tank if you want. When you ferment under pressure, you prevent CO2 from escaping, resulting in the beer absorbing it and becoming naturally carbonated.
The fermenter you use will have fittings to connect your CO2 regulator, which you can then either serve directly from the fermenter or make a closed transfer to your serving dish.
The natural carbonation will typically happen when fermentation is complete, saving you time and CO2.
5 - Improved hop flavour and aroma:
One of the added benefits of fermenting under pressure is that the aromas and flavours that would typically be released through the yeast lock are now trapped in the fermenter and end up in the beer. All the hop oils that would typically be allowed to escape are now present, which when it comes to aroma and flavour have a significant impact on the final product.
6 - Bigger brews:
One interesting thing that happens in a pressurised fermentation vessel is that fermentation is actually less vigorous. The foam you typically see rising up doesn't develop to the same extent. This means that you don't require as much free space above the wort in your fermenter. This means that you can either use a smaller yeast vessel or even better, you can brew larger brews. Of course, I prefer to brew the bigger brews!
Those are the main advantages and some essential reasons to try this method, but there are some disadvantages that you should also be aware of...
Disadvantages of pressure fermentation
1 - This can stress your yeast:
Stressed yeast is not a good thing, it can result in an under-fermented beer, meaning the yeast didn't convert as much of the sugar into alcohol. This happens as a result of excess pressure on them. Too much pressure prevents them from growing. Although it's very difficult to kill the yeast, you must be careful not to inhibit their growth. Anything over 2.5 Bar and you could have problems. This is easy to prevent if you pay attention to the pressure. The pressure should be kept between 0.7 - 1 Bar, then you will be on the safe side.
2 - Some beerstypes demand esters (fruit-like Flavour):
Remember we said this method will reduce fruit-like off-flavours? When brewing beer where you want these flavours, pressure fermentation is not the solution. If you brew such a beer, simply use the traditional fermentation method.
3 - Additional costs involved:

This method will cost a little to get started.
On brew day, simply start your fermentation as usual. Pour in the yeast, put your yeast lock in place and ferment at the temperature recommended on the yeast packet. Let the fermentation get going for 1 - 2 days.
You can't use your standard plastic or steel container or demijohn as they don't perform well under pressure. Most craft brewers will buy a yeast container that is designed to be used under pressure.
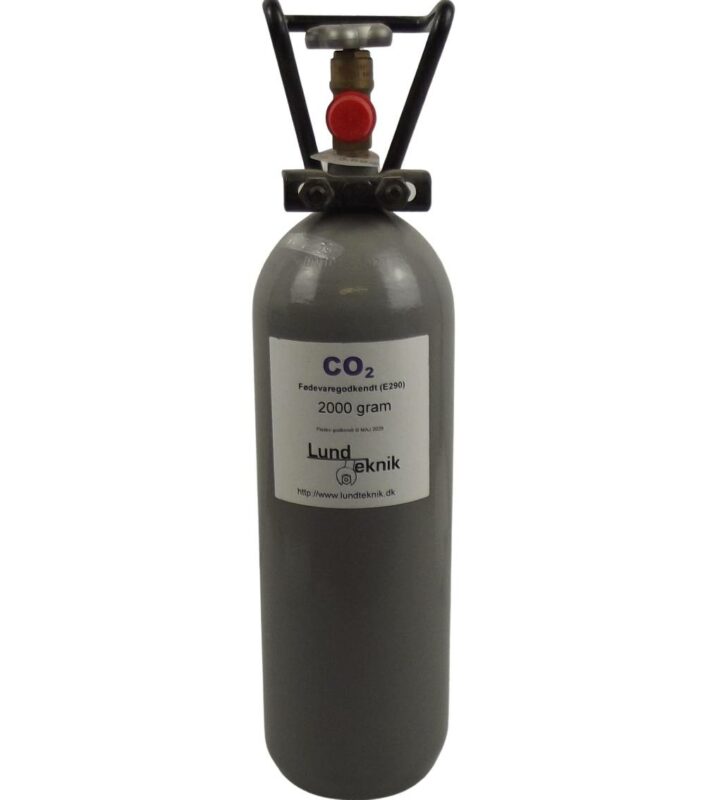
You can also use a Cornelius keg, but you'll need to use an automatic spunding valve that regulates the pressure in the container. In addition, you will need a transfer hose, fittings, regulator and a CO2 bottle if you don't already have these.
4 - Peatumling can be a challenge:
The main concern with dry hopping is that when you add the hops it creates a reaction in the beer very similar to adding mentos to a cola, like a volcano starting to rise in your fermentation vessel. This can cause quite a mess if you're not prepared for it.
Don't let this stop you from trying this fermentation method, it's not that big of a deal and there are many things you can do to prevent this from happening, which I will go into later in this post.

5 - Bottling is more challenging:
Although I bottle most of my beers in kegs, I do enjoy a bottle of homebrew from time to time. So if you're like me and like to bottle 1-2 bottles from a batch or if you bottle the whole brew, be aware that the bottling process is different when you ferment beer under pressure.
You don't need to add secondary sugar as the beer is already carbonated, but you will need to use a bottle filler with back pressure. You can't use your siphon and bottle filler as you'll have to open the fermentation tank and risk oxidising your beer. You want to keep as much of the carbonation in the bottle as possible.
What types of beer can be fermented under pressure?
Virtually any beer can be fermented under pressure. The thing to remember is that pressure keeps ester formation to a minimum, so if esters are important to the style of beer you're brewing, don't use pressure during fermentation. In most beers you don't want esters present, but beers such as German hefeweizen are desirable, so keep that in mind.
Lagers (bottom-fermented beers) do incredibly well under pressure. One of the great things about pressure fermentation for lagers is that you can turn the temperature up higher than you normally would. This will speed up the fermentation process significantly and since the esters are kept to such a minimum, your lager beers will be incredibly clean. With lager, you can turn the pressure up to between 0.7 and 1 Bar.
Ales also respond well to this method, but just not quite as well. This is because ales can become more strained under pressure, so you can't put as much pressure on them. So stick to a range of 0.5 - 0.8 Bar and you'll create some good and tasty ales.
As for the hoppier ales, such as APAs and IPAs, it will be up to your personal preference. Some brewers really like to ferment these beers this way as all the flavour and aroma from the hops remains in the fermentation vessel and is better absorbed by the beer. This results in very nice hop characteristics shining through in the final product. The challenge with these types of beers is when it comes to dry hopping. We'll look at that later in this post.
2 steps for pressurised beer fermentation
It's a simple 2-step process to get started with fermentation this way. You need to get a fermentation vessel capable of withstanding the pressure and then you need a way to regulate the pressure inside the fermentation vessel.
Step 1 - Choosing one yeast container:
As we mentioned earlier, you can't use your plastic or steel container or demijohn as they won't be able to withstand the pressure. You need to use a yeast container that is specifically designed to do so.
Today, there are plenty of commercial options available to you. If you're looking for the most economical fermenter that will work well, Keg King lays out a few great options that most hand brewers use.
Another great option is to simply ferment in your Cornelius keg. They resist pressure and work really well, many craft brewers use them too.

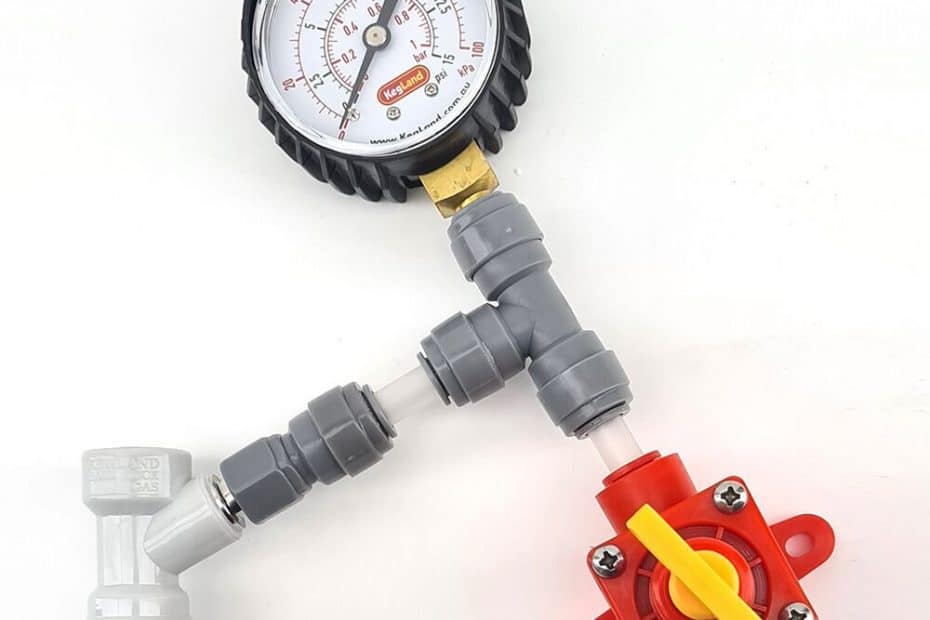
Step 2 - Regulating the pressure:
You control the pressure you want in your yeast tank with a special tool called an automatic spunding valve. It works by setting your desired pressure level and when the pressure reaches or exceeds that level, the valve allows CO2 to be released from the yeast tank, thus maintaining the set pressure level.
How to ferment under pressure
Then move to pressure fermentation by connecting your automatic vent valve and setting it to the desired pressure level. By starting fermentation the traditional way, you ensure you get plenty of yeast growth from the start.
Instead of using a yeast lock, you can connect the automatic vent valve and set it to as low a pressure as possible. This way, after 1-2 days, all you need to do is adjust the valve to maintain the pressure level you want. There is less risk of oxidisation by doing this.
Dry hopping during pressure fermentation
As we alluded to, dry hopping under pressure is not as simple a process as doing it with a traditional fermentation system. The problem is the volcanic eruption that takes place when you add the hops. With beer, it's not a pretty sight. What happens is that the beer has bound more CO2 than the pressure can hold and impurities, here the hops, release the CO2. The effect is self-reinforcing, hence the 'volcano'.
Don't overthink this or worry about it. The following are ways you can dry hop that will prevent this from happening:
1. Your first option is to simply release all the pressure from your fermentation tank. You will notice that the krausen (foam on top) will start to rise and let it get close to the top of your fermentation tank and then close the vent valve. When you close the valve, the krausen will start to shrink back down. Let it shrink back and then release the pressure again. Repeat a few times until all the pressure is released. Open your yeast tank and quickly add your hops and close it again.
On Keg King Fermentor's, unscrew the safety valve holder and you can fill hops in pellet form directly into the tank without removing the lid.
You can pressurise and flush the yeast tank with your CO2 from the regulator or let it do it through the vent valve on its own.
2. Through the magic of magnets, you can dry hop without the worry of oxidising your beer as you might have with the first option. Simply fill your hop bag with your hops and place a magnet in it and tie it. Place the hop bag inside your fermentation tank above the wort level and hold it there. Using a 2nd magnet on the outside of the fermentation tank, bring the two magnets together and the hop bag will remain held above the wort level. The key here is clearly to make sure your magnet is strong enough to hold the hops. When you're ready to dry hop, simply remove the outer magnet and the bag will drop into the wort. You can hold as many hop additions as you wish.
3. If you have two fermentation vessels or kegs, you can move from one to the other. Put your dry hops in the 2nd fermenter, seal it and flood it with CO2, then transfer the beer from the first fermenter under pressure to the second.
4. Yeast tanks with a collection bottle are available and can be used for dry hopping. In this case, put hops in pellet form in the container, fill it with boiled chilled water and place it on the tank. Remember to open the valve...
Curiosity
Now you have an understanding of the pros and cons of pressure fermentation. Most brewers who use this method do so because it saves them time, reduces CO2 and produces a beer that can compete with many microbreweries. PFuck it and see for yourself.